/ customer services /

Online sandblasting assistance

In this section you will find all the answers to the most common questions about routine maintenance activities for sandblasting, shot peening machines and filters.


Venturi systems

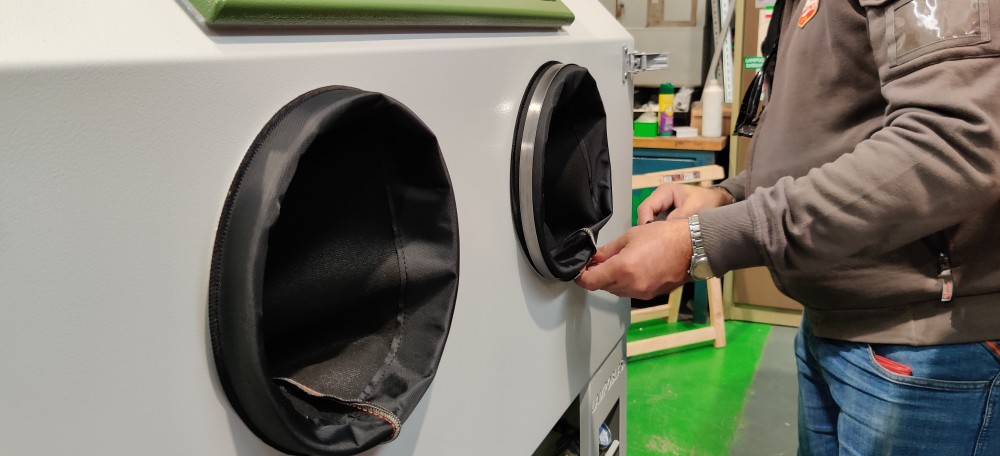
  • unscrew the special clamps
  • take out the worn gloves
  • place the new gloves by turning the part where the seam is present
  • tighten the clamps

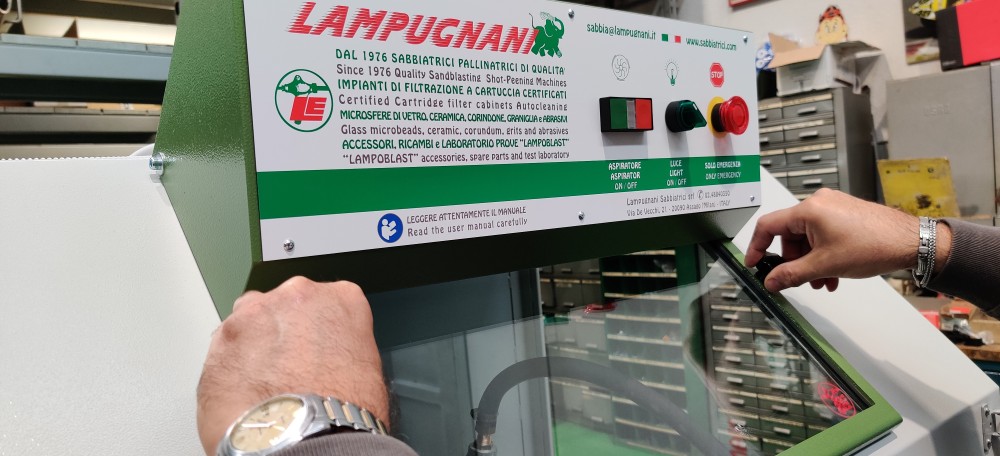
  1. unscrew the lateral Allen screws of the control panel
  2. lift the control panel and position it on the top part of the cab
  3. unscrew the knobs on the glass counter-frame
  4. remove the counter frame
  5. remove both glasses on the cabin (laminated and thin internal)
  6. insert the new thin internal glass in place of the worn one
  7. insert the new laminated glass in place of the worn one
  8. place the counter frame
  9. screw the fixing knobs

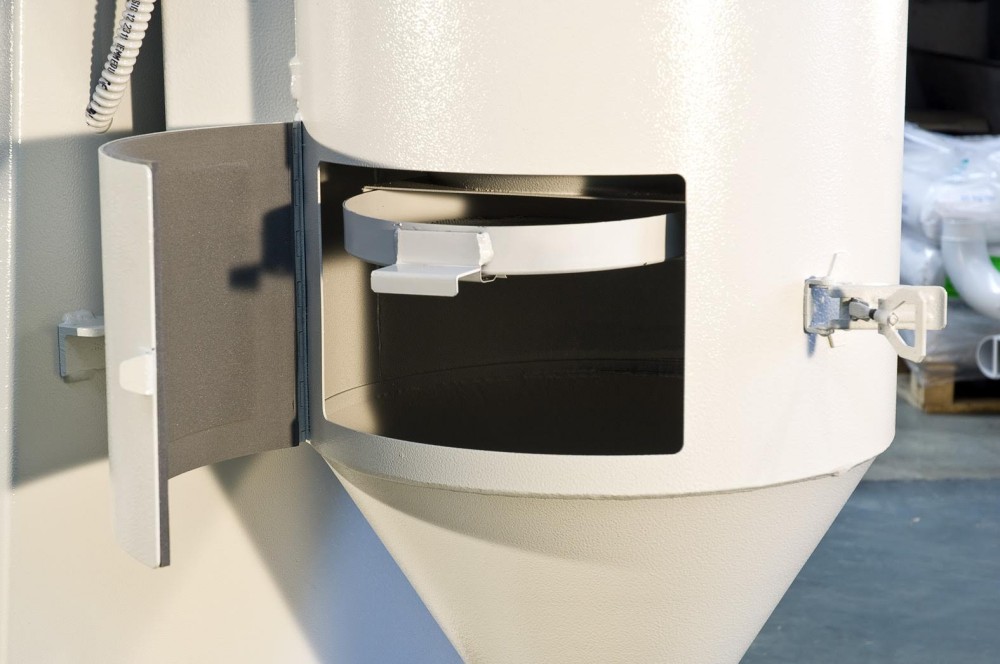
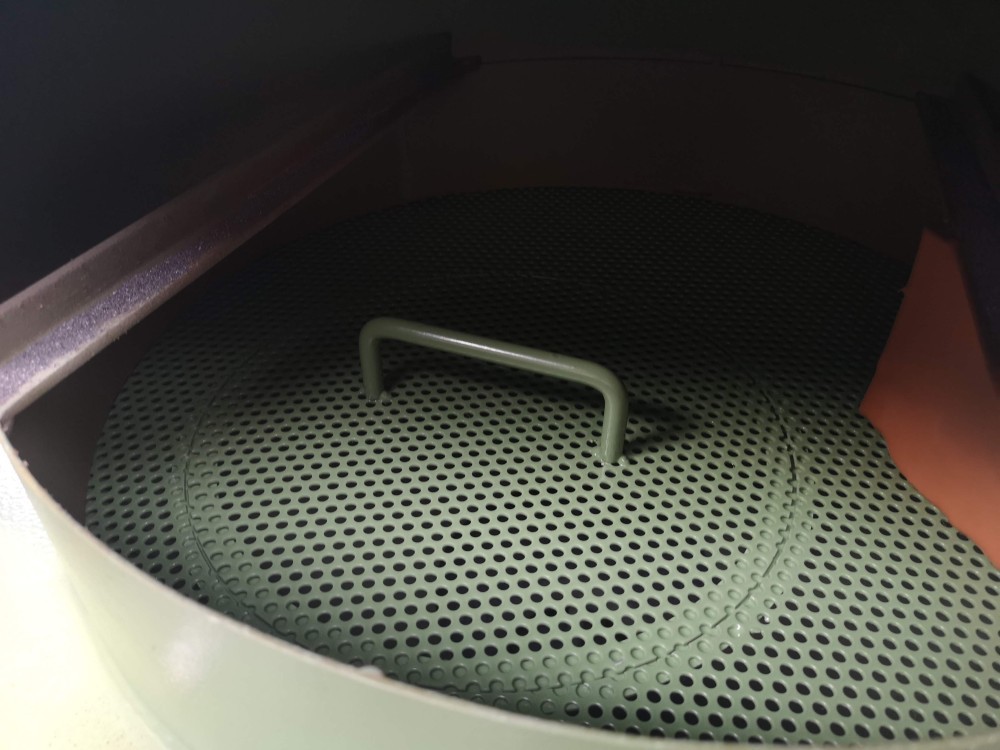
  1. open the cyclone door
  2. take out the sieve
  3. remove the impurities present
  4. reinsert the sieve into the special compartment
  5. replace the sieve in case of wear

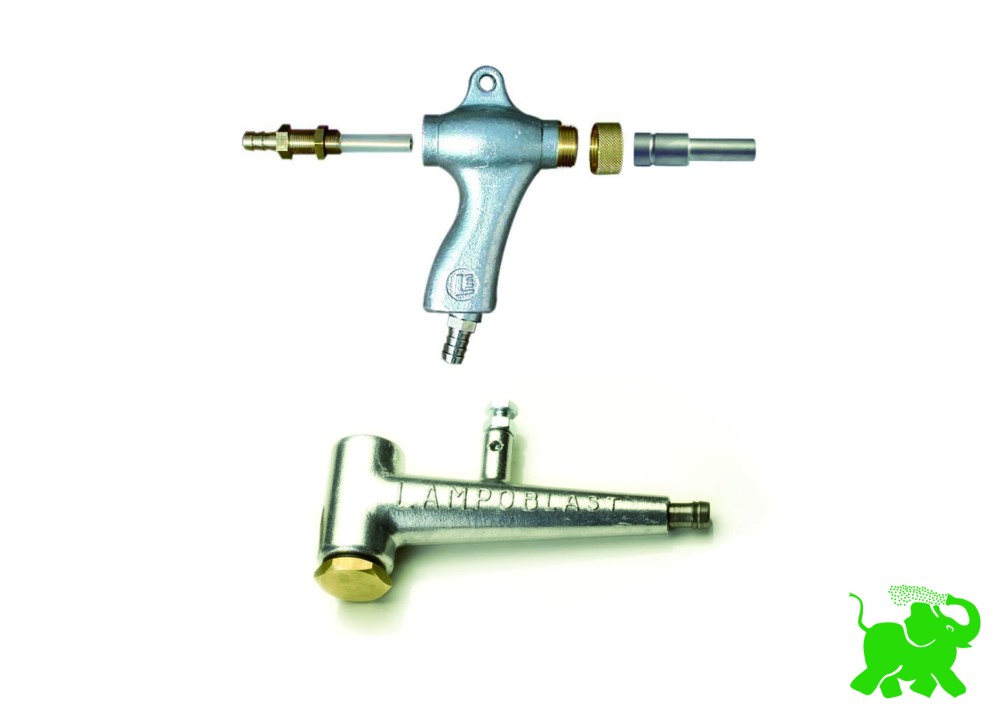
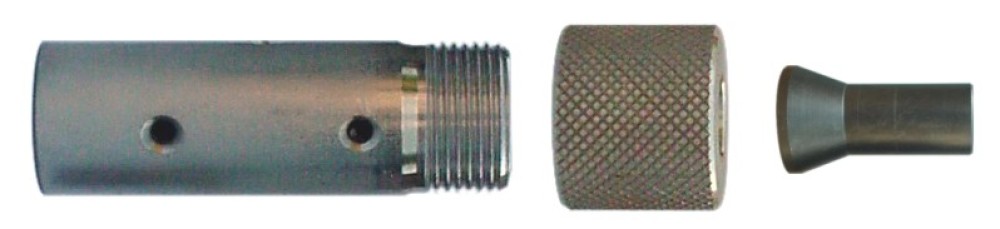
  1. extract the worn parts from the gun body
  2. in the case of the air injector: use the gauge to measure the distance between the nut and the lock nut of the injector, keeping the distances of the previously mounted injector
  3. in the case of the nozzle: unscrew the brass ring extract the worn nozzle and insert the new nozzle
  4. in the case of the hose holder: extract the worn hose holder and screw on the new hose holder


NOTES: for a longer life of the nozzle, it is recommended to rotate it every now and then to have homogeneous consumption

If no product comes out of the sandblasting gun, proceed as follows:


  • check that there is product inside the booth
  • make sure the compressed air is dry and anhydrous to avoid solidification of the sand
  • check that the pieces treated are in turn dry and free from oily residues
  • eliminate any residues that prevent the correct flow of sand


"QUICK" SYSTEM CLEANING


  • place containers under the hopper and under the cyclone (if version with cyclone)
  • open the hopper and cyclone caps (if version with cyclone)
  • turn on the system with the aid of the sandblasting glove, plug the nozzle of the gun
  • press the blasting pedal


This will create a regurgitation effect which will eliminate any obstructions inside the:


  • Pistol
  • Mixer
  • Sand tube


If "quick" cleaning is not sufficient, we recommend checking the inside of the gun body and the mixer to remove any residues. Check the state of wear of the components and replace them if necessary.


To empty and clean the system, proceed as follows:

  • place containers under the hopper and under the cyclone (if version with cyclone)
  • open the hopper and cyclone caps (if version with cyclone) and empty the "big"
  • turn on the system
  • with the aid of the sandblasting glove, plug the nozzle of the gun
  • press the pedal sandblasting control (regurgitation effect and consequent cleaning of the sand tube)
  • use the dust gun (compressed air) present inside the booth to blow the finest dust residues
  • turn on and off the electric fan to make the sand fall out of the hoppers


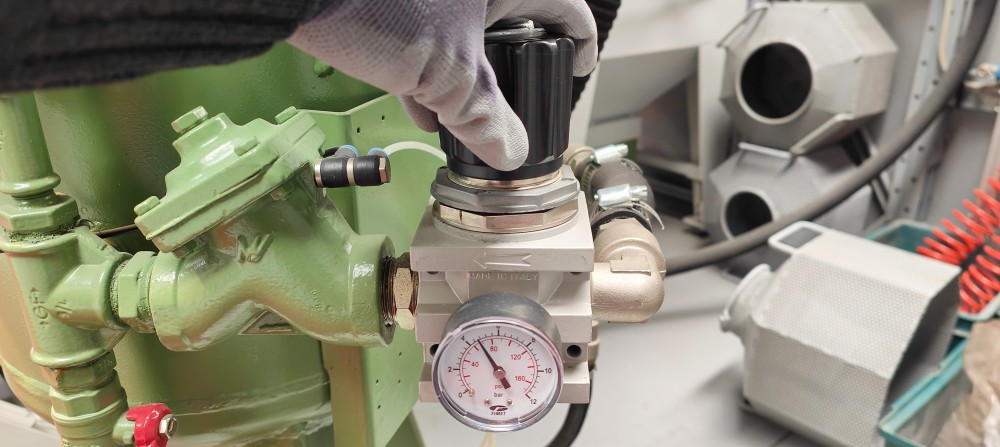
Act on the pressure regulator with the manometer positioned on the front/right side of the system.

  • clockwise = increase pressure
  • counterclockwise = decrease pressure

we recommend a range of use from 2 bar to max 8 bar pressure

Pressure systems

  • unscrew the special clamps
  • take out the worn gloves
  • place the new gloves by turning the part where the seam is present
  • tighten the clamps

  1. unscrew the lateral Allen screws of the control panel
  2. lift the control panel and position it on the top part of the cab
  3. unscrew the knobs on the glass counter-frame
  4. remove the counter frame
  5. remove both glasses on the cabin (laminated and thin internal)
  6. insert the new thin internal glass in place of the worn one
  7. insert the new laminated glass in place of the worn one
  8. place the counter frame
  9. screw the fixing knobs


  • open the cyclone door using a vacuum cleaner
  • remove any residues
  • close the cyclone door

NO sand comes out of the blasting lance

  • check that there is product inside the tank
  • make sure the compressed air is dry and anhydrous to avoid solidification of the sand
  • check that the pieces treated are in turn dry and free from oily residues
  • eliminate any residues that prevent the correct flow of sand: tank, sand hose and sandblasting lance


To empty and clean the system, proceed as follows:

  • leave the system on for the time necessary to recover all the product inside the cyclone
  • unscrew the "Y" under the tank and collect with the aid of a container
  • suck up the product present in the cyclone with the use of industrial vacuum cleaners


Act on the pressure regulator with the manometer positioned on the edge of the tank


  • clockwise = increase pressure
  • counterclockwise = decrease pressure

we recommend a range of use from 2.5 bar to max 8 bar pressure

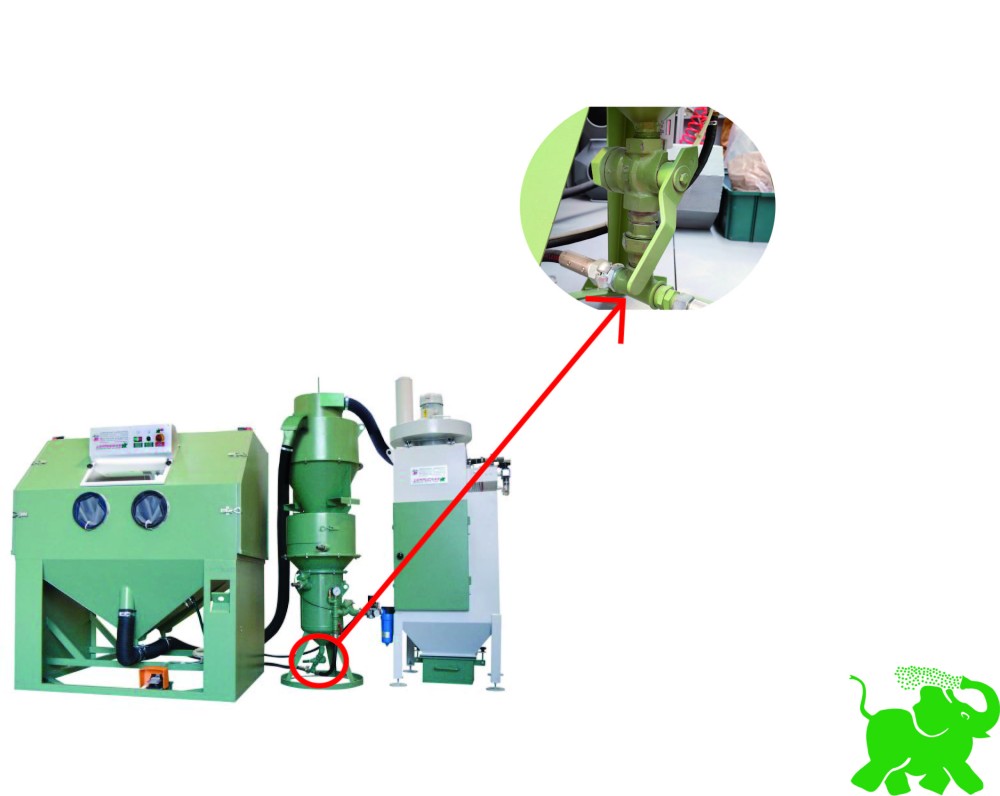
To optimize the flow of the abrasive it is necessary to interact with the lever positioned under the tank hopper.

  • Lever up = close valve (less abrasive)
  • Lever down = valve opening (more abrasive)

  1. Insert the hose and allow it to protrude approximately 5 mm from the sleeve

  2. Screw in the appropriate sealing screws between the sleeve and the hose

  3. Wrap the thread of the sleeve with approximately 10 turns of "teflon" tape

  4. Tighten the bayonet fitting securely, using any necessary tools

Filtration systems


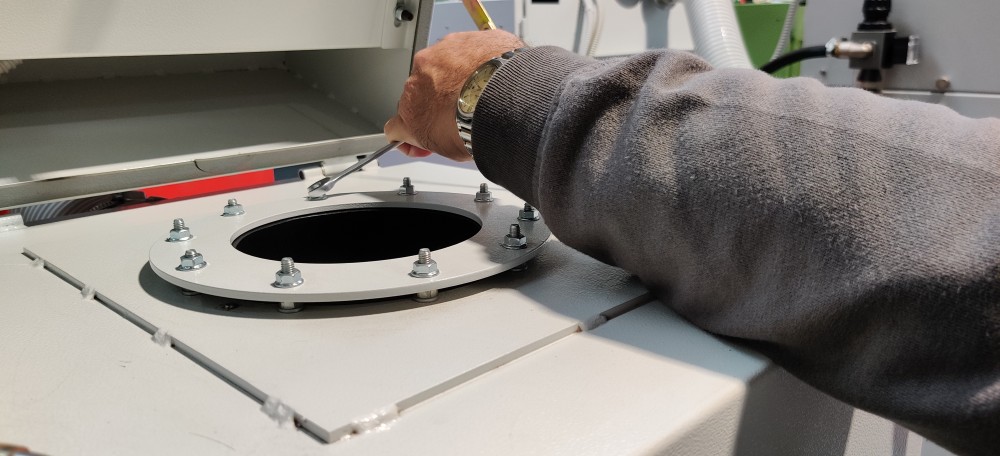
  1. lift the lid at the top of the filter cabinet
  2. unscrew the bolts on the round flange

  3. pull out the worn cartridge

  4. insert the new cartridge

  5. tighten the flange by screwing the bolts evenly

  6. close the lid


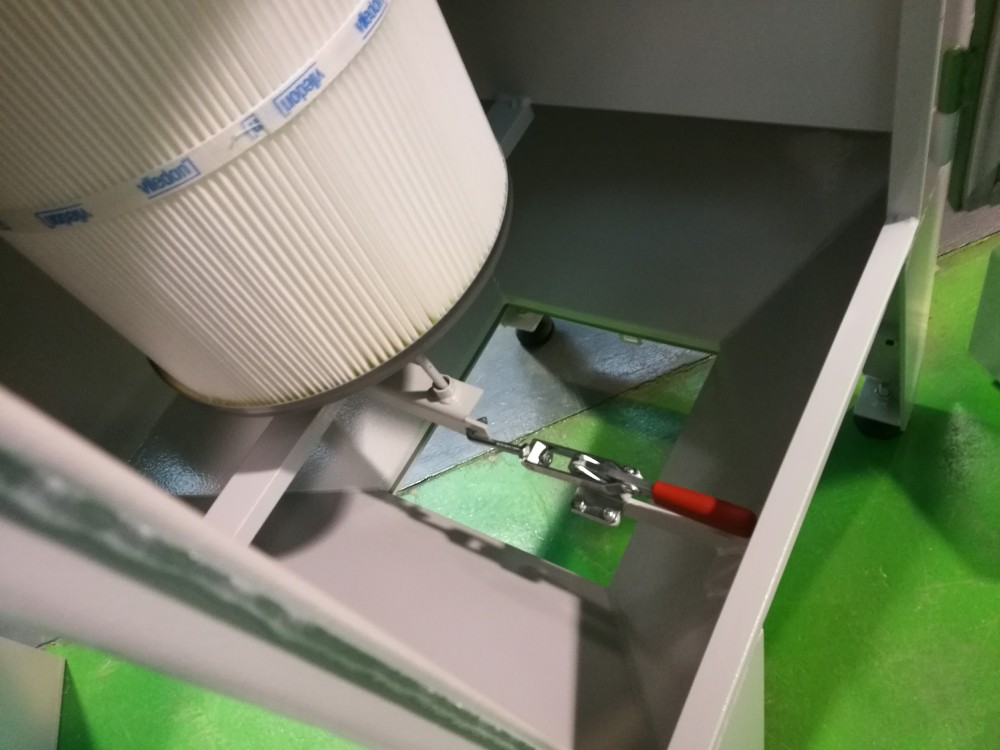
  1. open the front inspection door
  2. use the lever to release the cartridge
  3. remove the used cartridge
  4. insert the new cartridge
  5. use the lever to lock the cartridge
  6. close the filter door

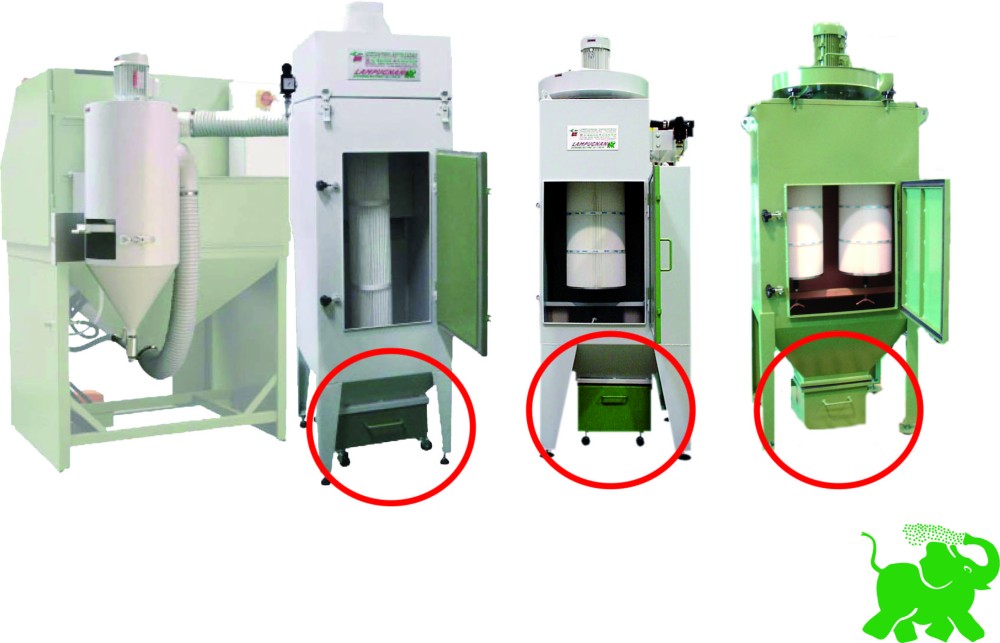
To ensure effective filtration, we recommend cleaning the dust collection drawer periodically as follows:

  • open the latches that hold the drawer
  • remove the dust collection drawer
  • dispose of the powders according to the laws in force
  • reposition the drawer in the seat of the filter cabinet


We recommend using a collection bag inside the drawer to facilitate emptying operations.


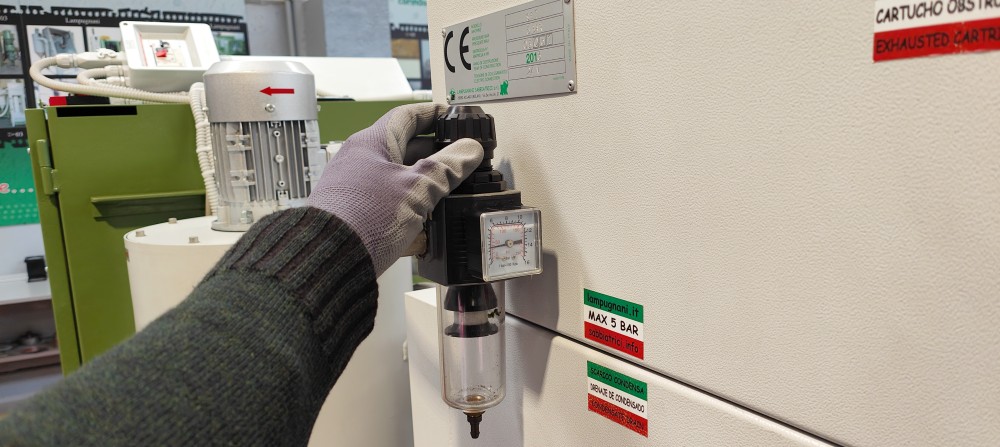
Act on the pressure regulator with the manometer positioned on the side of the filter cabinet.

  • clockwise = increase pressure
  • counterclockwise = decrease pressure


we recommend adjusting the pressure from 2 to 3 BAR


DO NOT ADJUST THE PRESSURE BEYOND 5 BAR, it could lead to excessive stress on the cartridge and premature wear.

It is recommended to always read the use and maintenance manual.


For perfect use of the machine, we recommend using only original LAMPOBLAST sandblasting spare parts .

Warning : Before carrying out any maintenance activity, remember to disconnect the system from the electrical and pneumatic networks.


For any questions, please contact technical support: sabbia@lampugnani.it

Ultimo aggiornamento: 21/09/2026